
How a Single Variable Can Ruin a Lighting Project
Published July 2015
In this comparison we’re going to look at one promising lighting project, designed with energy-efficient LED fixtures to replace aging and costly CFL fixtures. However, the initial outcome of the project was horrible, and didn’t give nearly the results the client was looking for when they decided to do a lighting upgrade. The premise of this story is that it’s important to do your homework for every project, to look at photometrics, understand the products that are being specified in your project, and know how they will perform in real life. This knowledge is paramount to project success. Let’s examine the project and how the tiniest change in a fixture almost ruined it.
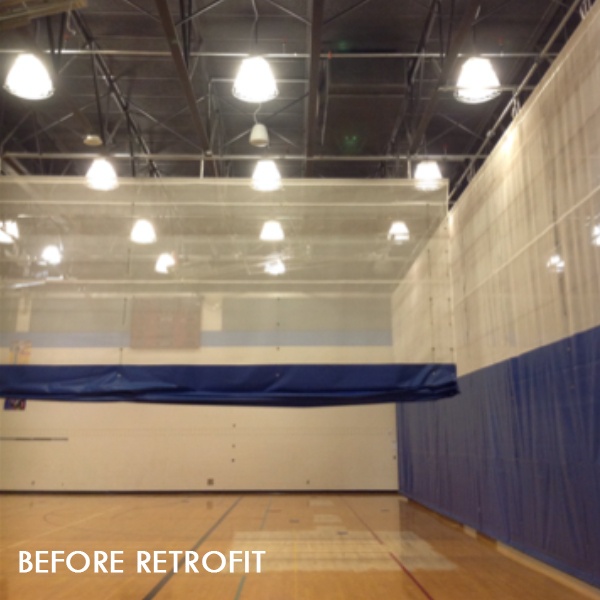
Here’s the before photo of the project area, a gymnasium. The existing CFL high bay lighting system was 66 total fixtures, each containing eight lamps, four ballasts, and using 42 watts per lamp. Fixtures are designed on a fairly dense grid, and the light quality appears to be pretty good, but we know these fixtures are burning a ton of energy. This system also required more regular maintenance than an LED system would require; aside from the energy savings, maintenance savings was a big consideration for doing this project. Even though this isn’t a very old system and was engineered to be efficient, no consideration was given to the cost of future maintenance. With lamp prices exceeding $15 and ballast prices in the $20s, we know how much it must have cost to maintain.
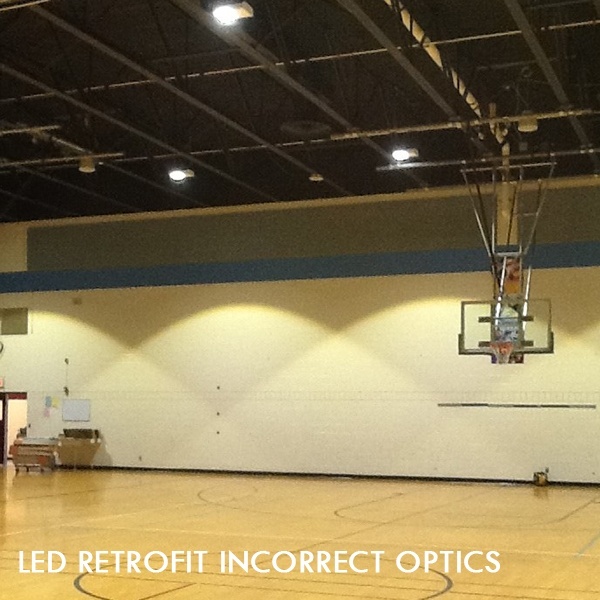
A new lighting system was designed using LED fixtures. Successfully, half of the fixtures were removed, light levels were increased in the new lighting design, and this customer was set to save $6,700 in lighting costs annually. Looking at this second photo, you can probably tell something was wrong with this installation, but what? The correct fixture was installed, after all. The answer is the LED optics, the way the light is directed from the fixture, was incorrect. The system was designed to put a specific amount of light onto the floor, without considering vertical footcandles. These incorrect optics led to a scalloped effect on the wall. You can see in the next photo, the incorrect optics are casting these cave-like shadows, and make the room look awfully under lit. Keep in mind, this fixture is the same fixture specified, technically: it reduces energy usage by 65%, has a long life to reduce maintenance costs, and is an “LED hi-bay” fixture. After some research and working with project developers, it was determined that a low bay optic would provide must more uniform lighting all the way up the wall.
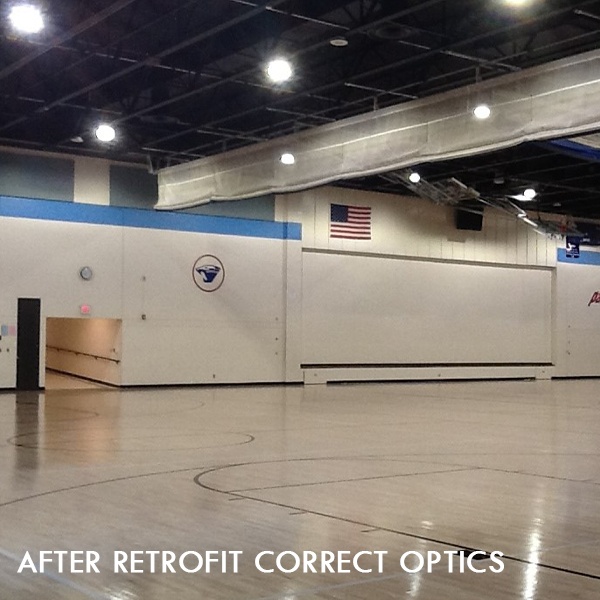
The point of sharing this story is to say that the success of any lighting project is in the details. In the final photo below, you can see the project area with the same fixture used in the second photo, but now with the correct optics. It’s the project envisioned from the start, with successful results.
Imagine in this scenario, the same project is being presented by two different lighting contractors. The quotes presented to the customer both promise dramatic energy savings and reduced maintenance costs that match the project goals. Imagine further that you were purchasing this lighting project, and that each quote you received is equal in cost. How would you know which project to purchase? Looking at the results photos for incorrect optics and the final after photo here, which would you want? This is an issue that can happen any time two energy-efficient lighting designs are presented by different contractors. In this example, the only variable in the final results is one digit in a fixture code. The fixture manufacturer, layout, installation, and project area are all the same.
We’re sharing this project with you to highlight the extreme importance of comparing apples-to-apples when you compare lighting projects. Here are our top three tips to be sure you are making good comparisons:
1) Compare the total number of fixtures being installed on the proposal to the number of existing fixtures. Are these numbers the same on each quote?
2) Ask for photometrics for your project. This will tell you the existing and anticipated foot candles in your project area. Which proposal’s photometric layout meets your project goals?
3) Investigate and compare the cut sheets for the proposed fixtures to be installed. Are you really comparing the same variables? (wattage, lumens, and fixture life)
Read more by downloading “11 Questions You Should Ask a Lighting Contractor” or our ebook, “How Much Does a Retrofit Cost?” for more insight on project planning for your lighting upgrade.